Thursday, May 3, 2012

Susie's Jade-ite Collection

Hello! Hello! Today I am so excited, because I get to share with you one of my favorite things! It is green jadeite glass! I have been collecting a few pieces here and there for a little more than a decade or so. I haven't added to my collection for quite some time.
Recently, I was blessed with a kitchen remodel. One of my favorite parts of this kitchen is the little built in china hutch. It may not seem fancy, just a cupboard with a dish rack underneath. But to me it is an exciting place for me to put my pretty things!

My built in china cupboard.
So recently, I was taking out my dishes, and trying to re-arrange and clean. I want to make the cupboard a little prettier. As I put the pieces on my dining room table, I looked and just had to take some pictures to share with my blog friends.
 Before we had finished the kitchen (It still needs a few things, but mostly done),
my pretty dishes had been stored away here and there.
I hadn't seen them all out and together like this before! I actually have much more than I had realized.

These pretty green glass beauties are mostly Fire King Jade-ite.
So arranging them for a picture was actually a bit of a challenge!

The salt and pepper shaker came from Cracker Barrel.
I found the candy dish at a second hand store.
When I first fell in love with this glass, it started with the salt and pepper shakers. They were from the front general store inside the Cracker Barrel Restaurant.
No not vintage, they are reproductions, but so lovely.

 Love this batter bowl. It is Fire King Jade-ite.yr 2000
Okay, batter bowls are just the greatest things! I love the big pour spouts and handles. I feel like I am really so cool when I make batter in this. I love batter bowls!

 These bake-ware pieces are Fire King.
Nesting mixing bowl trio, Jade-ite yr 2000. They are quite large, even the smallest!
 These candle sticks came from E-bay, not sure if old or not. But they are so pretty.
The little jar is missing the lid, I purchased at an antique store.
 My fraternal twins. Jade-ite and Green-glass.

Here is a shot inside my cupboard. I like the rubber mat, because I am a bit clumsy, and don't want to break anything.
The little silver strawberry candy dish was a gift from my Momma one year with her wonderful fudge!
 This is the label from all of the mixing bowls and bake-ware. My husband purchased them new for me!
I tell you, some times he likes to just spoil me, but just enough that I am not rotten! What a great guy! Thanks, Honey, I love you.


 I love them in the cupboard.

Those little crocheted potholders came out of a vintage bin for $1 each! I found at an antique resale booth inside out local flower shop. I had to add them to this cupboard, didn't I ?

The vintage crocheted potholders look cute with them.
I added the pretty lace edging to the shelves.
Okay finally to the end of my photos, if you held on this long! Good for you!
I wanted the cupboard to look prettier, so I took some paper doilies and cut them up and taped them together. I folded them down and slipped under the vinyl pad, so they would dress up the shelves.
Since I am forever trying to save money, I was proud of myself. I got the package of 50 paper doilies at the dollar store!
Now I need to maybe add something to cover the back inside wall? But it is a work in progress. Just like me. I am a work in progress.
So from being stored in boxes, to being displayed in my new little corner of my kitchen. I feel very proud, indeed!
When my Momma came to visit, I had to take her straight to this and open it up for her stamp of approval.
She gave it to me with much joy and happiness!
That is what makes me happy!
Bless you all so much! Thanks for looking at my pretty glass!


Saturday, April 28, 2012

Little Susie Home Makers Best Peach Cobbler Recipe and tutorial

My easy to make Peach Cobbler is always a huge hit with my family and friends. It is so easy to make! You will love the smell as it is baking! I just had to share my recipe with lots of pictures for a tutorial that will have you baking in no time!

Little Susie Home Maker's Peach Cobbler

 1 stick butter (1/2 cup)
2 cups sugar
2 cups flour
2 teaspoons baking powder
1 teaspoon cinnamon 
2 cups milk
1 large or 2 med cans sliced peaches
2 tablespoons brown sugar

The first thing you want to do, is put the stick of butter into your oblong baking pan. Then place in center rack of oven, then turn the oven on to preheat to 350* F.
The butter will begin to melt in the baking pan. 

Next, mix the sugar, flower, baking powder, cinnamon and milk in a large mixing bowl, into a batter. A long handle wooden spoon works just fine, but you could use a mixer if you like. Stir until well blended, but don't over beat.

 Remove the oblong pan from the oven and place on a hot pad or heat resistant area.
Carefully pour the batter from the bowl over the melted butter. Do not stir. The butter will ooze out to the side, and may not even be completely melted. This is okay.

Next open your canned sliced peaches and spoon the peaches over the top of the batter. 

Place by spoonfuls to evenly distribute. Discard the juice for some other use, but do not add to batter.
Sprinkle the top with brown sugar.

 Using hot pads, carefully place the baking pan back into the center of oven. You may place on a cookie sheet to catch drippings.

 Bake in 350*F oven for 40-45 minutes, or until the batter has puffed up and browned.

 Remove from oven and cool slightly before serving.

 This is really good with a side of vanilla ice cream, if you like.

Serve, eat, and enjoy!
  

A very favorite request of my husband and daughter. The warm taste of this fresh baked batter and peaches fresh out of the oven is just delicious.  When made ahead of time and served at room temperature it is very good as well!  I love to make this Peach Cobbler for birthdays, for dessert and even for brunch. It travels well for pot lucks. I hope you can enjoy this recipe.

Blessings,
Little Susie Home Maker

linking with
Blog Hop Social

Friday, April 20, 2012

Ride Through the Country with Bear

Yippie! I get to ride in the car!
Would you like to tag along on a ride through our country side with, Bear and I?
He and I enjoy our ride to his groomer every month. Jumping in the front seat, Bear is ready to go sight seeing along the way! So, I thought that I would take along the camera this trip and share what a pretty little ride it is to her place from our house.Bear has really pretty soft long hair, and he has a very nice groomer. She bathes and cleans him up every four weeks. Bear loves to go for his grooming.

 We see lots of beautiful and interesting things along the way. It was foggy this morning. The horses in the mist looked so pretty, don't you think?

 A near by street corner, have to take this picture of the mailboxes.

After, I drop off Bear, I pass the General Store.

Okay, this is when I go home and wait for my call to pick Bear back up, usually about 2 hours. After I go to pick Bear up, the fog has burned off. 

Bear is so excited to stop and say, "Hello!" to some nearby friends in the field! 

His friend says, "Hi!" back.

 I get such a kick out of how my Little Bear is so happy!

There is no shortage of farm life along the way.

I stop to take a few more pictures. There is plenty of cattle.

Look at this trio, a Bull. a Cow, and a Calf!

Bear and I make it back to our home. Doesn't he look pretty and happy? We will do it all over again in a few weeks!

I feel so blessed to live in such a pretty place. God has so many beautiful creatures that He has given to us.
I am so thankful,
Especially for my Little Buddy Bear!

Hope you enjoyed the ride!

Blessings,

Little Susie Home Maker

Wednesday, April 18, 2012

Vintage 50's Meatloaf Recipe


Do you like meatloaf?
Today I want to share a recipe with you from one of my favorite cookbooks.
This is a Better Homes and Gardens New Cook Book. It is missing the copyright page, but from researching on the web, I believe it to be 1950's. It has some pretty fun artwork, and fabulous content.
I have had this cookbook for several years now. I found it one day at a local Goodwill store. I just adore it.


Inside there is a penciled star from a previous owner on a recipe that I figure, must have been a favorite. What I want to share today is the 

Everyday Meat Loaf

2/3 c. dry bread crumbs
1 c. milk
1 1/2 lbs. ground beef
2 beaten eggs
1/4 c. grated onion
1 t. salt
1/2 t. sage
dash of pepper

Oven  350*
Soak breadcrumbs in milk: add meat, eggs, onion, and seasonings; mix well. Form in individual loaves; place in greased muffin pans. Cover with Piquant Sauce* (page 348).
Bake in moderate oven (350*) 45 minutes. Makes 8 servings. Or form one loaf in 8 1/2x4 1/2x2 1/2-inch pan. Spread with sauce; bake 1 hour.

*Piquant Sauce
Combine 3 tablespoons brown sugar, 1/4 cup catsup, 1/4 teaspoon nutmeg, and 1 teaspoon dry mustard.
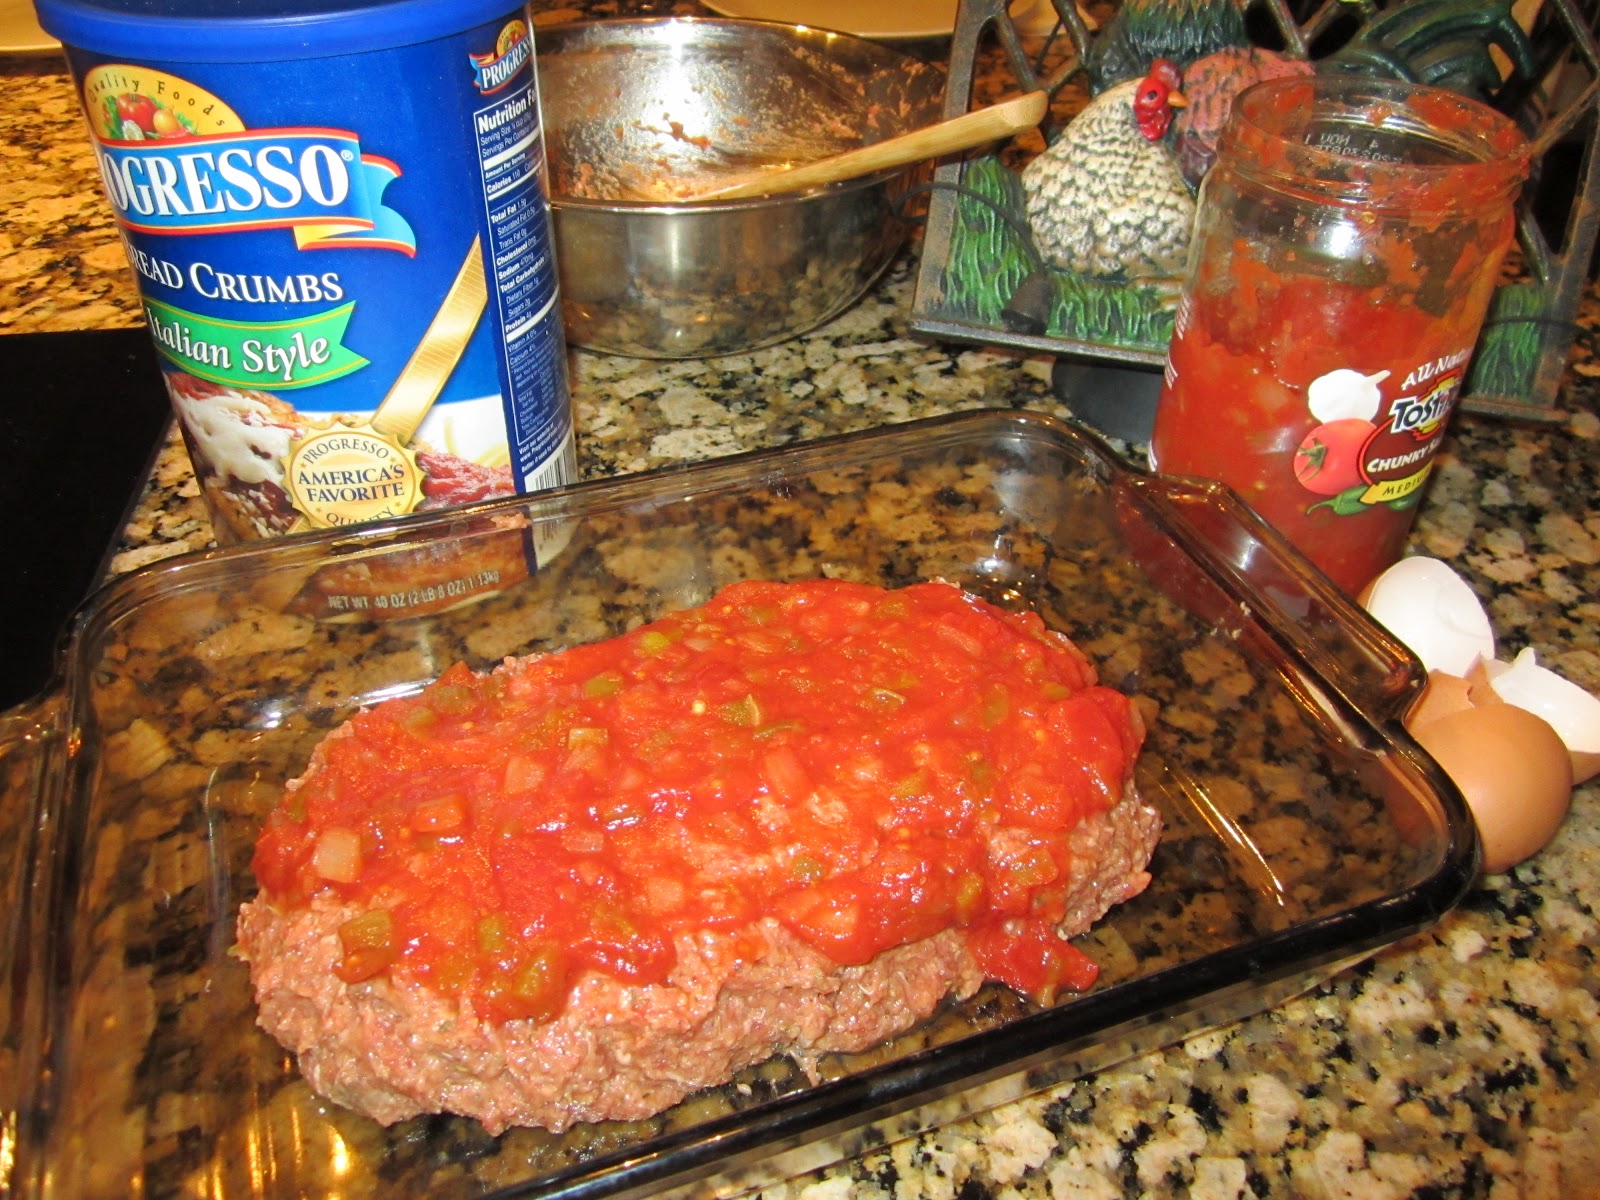
I took some personal liberties, and used packaged and seasoned bread crumbs, I also substituted a canned salsa, for the topping. Other than that, I did try to keep the making of this original.

It was a very simple meatloaf to make. The end result baked rather nicely and was firm and held together to slice.

My family and I enjoyed it for dinner, but it was just a little bland for my taste. But a very good base recipe to start a meat loaf on. And if only a few ingredients on hand, this makes a simple meatloaf to prepare.

Overall, I had fun preparing this and my family did enjoy eating it!

So, maybe you will enjoy making this 1950's style meat loaf, too.
I hope you are blessed by this post, and feel free to leave a comment! Have a great week!

Blessings,
Little Susie Home Maker

Linking to

Friday, April 13, 2012

Crochet Camera Pouch & I won a book!

 Hello and bless you! I have been enjoying a super busy week after the Easter Holiday.

This weekend while driving to another town for a family gathering, I brought along my yarn and hook. I wanted to make a little strapped camera pouch that I could easily carry and get my camera in and out of. So I took some bright and cheerful yellow cotton worsted yarn and started working away.
Here is what I made.


 I wanted a long enough strap to carry easily over my neck. Just a small pouch that easily holds my camera. There is enough room for my cell phone as well! I was pretty happy with how it turned out. Everyone like it as well. I just made up my own pattern as I went. It was one continuous yarn project and I never ended up cutting any yarn until the last knot I tied at the end. I incorporated the strap and slip stitched the sides.

I love this better than the store bought camera cases. 
It is much cuter, and really makes my camera accessible!
I took these pictures out in my yard this morning. Ever seen a tree with a camera pouch? Ha ha!


I went to pick up a package at the post office out here in the country. I was wondering what it could be? When I got there, I was pleased to find that it was my first prize I have ever one from a blog give away!


 I won this children's book from

She has such a warm family loving blog. I really enjoy her posts.
Thanks Connie!
I was pretty excited to win. And since my great niece is turning five this month. I think I will tuck it in with her presents!

. This week has been such a busy time, with errands, appointments, kids events, etc! 
Reminder.. did you get your taxes mailed? The deadline this year is April 17th.
I sure hope you are all having a great week!

Blessings,
Little Susie Home Maker

Wednesday, April 11, 2012

Valentine Swap 2017

 Don't you think Valentine swaps are fun? I sure do. Vivian had a nice big swap year That I signed up for and my partner was Cindy fro...